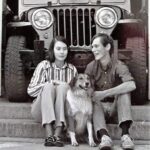
~ Here is a fun project that our customer Steve Ruedy sent to us.
“I built one of these around the 6th grade. A few mods to the steering and a Briggs and Straton lawn mower engine (horizontal shaft engines were plentiful when I was a kid). Enjoy!” – Steve Ruedy
COASTING along easily on velocipede bell bearings, this sidewalk Jeep will be the pride of any boy when he goes out on “reconnaissance patrols.” Being assembled almost entirely of wood, the Jeep can be made with ordinary tools. White pine or other wood that does not warp easily will be satisfactory for the framework. However, the wheels and axle housings should be made of oak or maple or, for each wheel, you can glue together four pieces of ¼-in. hardwood face to face with the grain running at right angles.
The frame is notched to receive the rear axle housing, Fig. 2, after which the front axle support is drilled and counterbored for the center bolt and doweled to the frame. Next, the front bumper is screwed to the frame, the screw heads being countersunk. To give sufficient strength to the front axle housing after the pivot hole is drilled, the housing should be made of 1 ¼in. stock. Fig. 4, the bottom edge of the housing being grooved to receive the axle as shown Fig. 3.
Lower edges of the engine hood are doweled and glued to the frame as shown in the lower detail of Fig. 7. A groove, ½ in. wide by ¼ in. deep should be cut on the outside of each piece to receive the top section of the fender, Fig. 5. The back end of the fender is cut at an angle of 34 degrees, Fig. 6, the corresponding end of the groove being chiseled to the same angle. The fenders are braced with an iron corner brace as shown in the upper detail of Fig. 7. Note that the sloping portion, Fig. 6, goes under the body side and that the opposite end is flush with the bottom of the groove cut for the top section of the fender as shown in Fig. 9. The horizontal section of the fender is glued into the hood groove and is screwed and glued to the sloping piece.
The grill, dashboard and back are installed as illustrated in Figs. 2 and 9. The grill is laid out according to the pattern in Fig. 1, jigsawed as shown, attached to the frame by dowels. Both the grill and the dash are screwed to the ends of the hood and the back is fastened to the frame with countersunk screws. The floor is cut from ½ in. stock, the pieces being butted against the dashboard and nailed to the top of the frame. Before nailing the floor down, however, drill a 1-1/4 in hole in the piece adjoining the dashboard, 1-1/4 in. on center from the front edge, for the steering post.
The body sides are 9¾ in. high at the front and 9 in. high at the back, Fig. 8, with the lower front corner cut off at an angle flush with the fender. The two sides should be tacked together and the curves band-sawed in one operation to assure identical pieces. They are screwed to the back, dashboard, floor and back rest. The back rest fits behind the floor and extends at an angle to within 1/2 in. of the top of the sides, both edges being beveled to fit the floor and seat respectively. To make the quarter round used on the sides of the hood, glue four pieces of 2 by 2 by 17-in. wood together, using paper between all joints. Turn this unit to a diameter of 3-1/2 in. and then split into four quarter-rounds with a chisel. Cut the false engine sides and end blocks shown in Fig. 7. Making and installing the seat rails will complete the body.
In turning the wheels a circle 3 in. in diameter should be marked on the wheel with pencil to locate the hub which will be turned separately. Note that the hole for the bearing is cut part way through the wheel to a point which will allow the bearing to run in the center, as shown in the circular detail, Fig. 4. Be sure the hole is cut in straight so that the bearing will be tight when it is driven to the center. After the bearing is driven in, it is followed by a tight-fitting wooden collar, glued on. If, however, velocipede bearings are not available, you can turn 1-in. spindles on the ends of an oak axle and drill the wheels to rotate with a snug rather than a binding fit. With this arrangement, spindles must be kept thoroughly lubbricated with graphite. To avoid any season cracks, it is well to give the wheel a coat of shellac or sanding sealer immediately after it is finished and sanded. The tire is then painted on with slate-gray porch or deck paint.
A wooden chuck is necessary for turning the hubs. It is merely a 5-in. wooden disk screwed to a 3-in. faceplate. The work is fastened to the chuck with wood screws inserted through the chuck into the work outside the area to be turned.
The steering wheel and cross arm are glued to their respective ends of the steering post after the support and collar are slipped on and the post is inserted through the floor as in Fig. 11. The support is bolted through the dashboard, all bolts being bradded to prevent their working loose. If an all-wood front axle is used, the flat-iron shackles shown in Fig. 4 may be eliminated and the steering rods bolted through both axle and housing as in Fig. 12. It is necessary that the steering rods pivot at a point directly beneath the front axle and that they be an equal distance from the center on both the housing and the steering crossarm, otherwise the mechanism will bind when the wheels are turned. It is better to locate these pivot points when the parts are being assembled to avoid any discrepancies. If two or more youngsters are to ride on the Jeep, the steering wheel may be placed on the left side to allow more than one to ride at the same time. In this case, the steering mechanism will consist of one pulley wide enough to take three turns of sash cord with a nail through the second turn, and a second pulley over which the cord runs to connect to the axles shown in Figs. 10 and 11. The cord should form perfect right angles when the front axle is square with the frame.
Four sash lifts make the steps on the side of the seat. A floor mat, electric horn, and spare wheel are suitable accessories. Paint the body a dull green, and use aluminum paint for the headlamps and the star in the middle of the hood.

Kaiser Willys Jeep Blog Story – If you would like to share your Willys Jeep Story please send us a line. We’d love to meet your Jeep.
Like Us. Facebook
Looking for, Willys Jeep Parts, Willys Jeep replacement parts, Willys Jeep body parts and much more for your 1941-1971 Willys vehicle, you have come to the right place!