
Part 2 of 3: Mechanical
Now on to the project…….

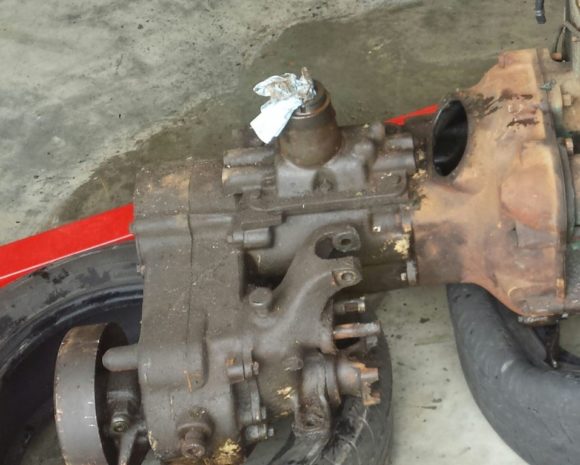
I started by getting the engine / transmission out. The engine didn’t have many miles on it. I remember dad bought the long block from the Sears Jeep catalog back in the mid 70’s and his NC National Guard buddies put it in for him. (Those guys were also a great source of “obsolete” M38A1 parts!!) I went through the engine, transmission, transfer case and replaced all the needed bearings, seals and gaskets. All new ignition parts, plug wires, fuel pump, water pump and rebuilt the carb. I cleaned/painted all the parts, adjusted the valves, and the powerplant was set aside for a while.


I then did a LOT of pressure washing to get all the years of crud off the jeep. I also figure around 20 cans of engine cleaner and 50 cans of brake cleaner were used on the project. During the cleaning, I found many things that made me smile….but also caused a bit more work and cost. The mud I found under the dash had to come from when me and my friends were riding around in a creek around 1979…and we “sunk”. I also found all four leaf springs were badly broken. That had to be the result of a jump in the local high school parking lot that would have made The Dukes of Hazzard proud. We caught a lot of air that night and landed in a cornfield…. upright… and the only injury was the guy in the back seat that hit his head on the roll bar when we landed. Good times….

I had to have the radiator re-cored due to the location of a few small leaks. The Jeep had also been stored with gas left in the tank which made a huge mess. I thought it was too far gone to fix. But a bit of time in a radiator shop hot tank, a few pinholes repaired, some paint and it was back in great shape!!
The front and rear axles were next. The steering knuckles/axles were all pulled and inspected. Kingpins were replaced and properly shimmed. Rear axles pulled easy with the Kaiser rear hub puller. Lots of cleaning and all new bearings/seals. Rebuilt all the brakes, including the parking brake. Once again, LOTS of cleaning / painting… then new shoes, wheel cylinders, drums, master cylinder and hardware. Also had to replace all four leaf springs (remember the Dukes of Hazzard jump??) with original take-offs along with new shackles.


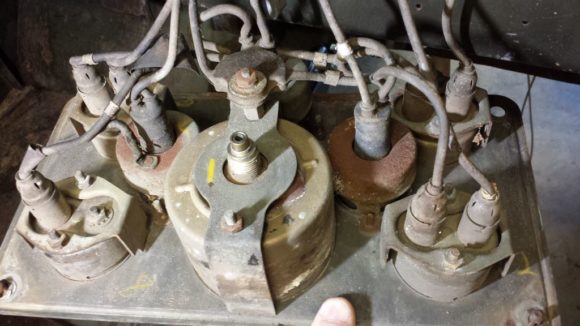
On to the electrical side……I stayed with the original 24 volt system. The wiring harness was very “crispy”. Not sure how she didn’t burn up. Lots of bare wires. Pulled out the old harness and installed a new one. Rebuilt / replaced the BO lights as needed. Replaced the dimmer and ignition switches. Removed the entire dash panel which was simple and made access much better for painting later on. Took the instrument panel apart. Checked all the gauges and replaced the “spider”. Had to also replace the fuel and oil pressure gauges. I must say twisting all those Douglas connectors wore my fingers OUT. But very cool to put everything back original.


As for the “interior”….sanded and painted the seat frames, installed new foam and canvas covers. Also drilled out the dimpled holes in the floor for the M31C machine gun pedestal. Gave the tool box a good sanding and a coat of rust killer. Welded up a few holes and prepped the inside of the tub for paint.

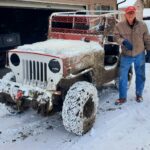
I then re-installed the powerplant because I wanted to make sure it was all OK. All I needed was a hot wire to the distributor and a gas can and she fired right up. Drove her around the farm with no fenders and the gas tank bungie corded to a board in front of the radiator. Driveline, brakes, engine….all ok!!!


Everyone tune in next week! Part 3 will be Keith’s experience with the body work.
Kaiser Willys Jeep Life – Keith Spillman
If you would like to share your Willys Jeep Story please send us a line. We ‘d love to meet your Jeep.
Like Us. Facebook
Looking for, Willys Jeep Parts, Willys Jeep replacement parts, Willys Jeep body parts and much more for your 1941-1971 Willys vehicle, you have come to the right place!


Bet you went through many gobs of hand cleaner.
Great job! Great pics.
see a lot of work that you have completed, i am pretty much in the same mode as you, my engine is in and frame is completely redone and all new brakes and suspension, wheels and tires next. did have one unexpected issue and that was a leak from transmission seal on the front end and also found 1st/reverse pretty worn so am replacing those.
Next step body (ugh) mine is much worse tha yours
Ira
Most helpful, I recently hotwired my M38a1 and ran down the street. Body off now for paint. Great to see your pics as reference. J
Looking Fantastic! Working on a 1952 M38A1 myself. Will be a Fall project! Anxious to see your Part #3! Keep up the great work!
Very informative for a fellow m38a1 owner.